1.21.2022

French Dip Sandwiches

2-3 lb beef chuck roast
1/2 cup soy sauce
1 - 15 oz can beef broth (1 3/4 cups)
1 bay leaf
1/2 teaspoon black pepper
1 teaspoon dried rosemary
1 teaspoon dried thyme
1 teaspoon garlic powder
hoagie buns
swiss cheese slices

Remove and discard the fat from the roast. Place the trimmed roast in an instant pot. In a medium bowl, combine soy sauce, beef broth, bay leaf, pepper, rosemary, thyme, and garlic powder. Pour mixture over the roast.

Place lid on Instant Pot with steam valve closed. Set to "manual" for 70 minutes on "high" pressure. Once finished cooking, do a quick release.

Take the meat out and shred it, then return the meat to the pot on "warm" setting for 10-15 min. Remove meat from broth, reserving the broth.

Distribute the meat on hoagies and top with swiss cheese. Place under a broiler until the cheese is melted and the bread is toasted. 

Pour reserved broth through a fine mesh strainer, into a fat separator. Let the fat settle at the top for 5 minutes. Transfer the broth, without the fat, into bowls for dipping.

recipe and image adapted from ohsweetbasil.com

1.15.2022

Homemade Rotisserie Chicken Stock

1 leftover rotisserie chicken carcass and any drippings left in the container
2 medium carrots roughly chopped (or 10-12 baby carrots)
2 stalks celery roughly chopped
1 medium onion roughly chopped
5 sprigs fresh parsley
1 bay leaf
10 whole peppercorns
6 cups cool water

Place chicken carcass in a large stock pot or dutch oven.* Add the carrots, celery, onion, parsley, bay leaf, peppercorns. Add water and bring to a boil. Cover and reduce heat to medium-low and simmer for 1-2 hours. 

To strain the broth, set a fine mesh strainer over a large bowl (preferably one with a pour spout). Remove the large carcass pieces with tongs and discard. Working in batches, scoop the vegetables and broth into the strainer and bowl. Press to remove as much liquid as possible. Discard the solids.

Broth may be refrigerated for 10 days, or frozen for up to 3 months. I prefer to use quart canning jars. Remember to leave head space at the top of the jar if freezing. Makes about 1 1/2 quarts stock.

*Crock pot instructions: Cook on low for 4-6 hours.
Instant pot instructions: Set to high pressure for 15 minutes. Let pressure naturally release.
Roaster oven instructions: (Good for multiple carcasses) Heat at 400 degrees until simmering. Reduce heat to 300 degrees and simmer for 2 hours.

Note for multiple carcasses: I prefer to do 3-4 carcasses at once in the roaster oven. All other ingredients should be increased proportionally. 

recipe and image adapted from garlicandzest.com

1.13.2022

Olive Garden House Salad

1 bag of salad mix, or 3 romaine hearts chopped
baby tomatoes, whole or halved
red onion, sliced thin
mild pepperoncini peppers
black olives
croutons
fresh grated parmesan cheese
Olive Garden brand salad dressing

In a large salad bowl, layer ingredients. (Amounts are adjustable for the size of salad desired.) When ready to serve, add dressing and toss.

Image from mustlovehome.com

Easy Chocolate Orange Truffles

10 oz dark chocolate chips
2/3 cup heavy cream
1 tsp orange extract, or 3-5 drops orange essential oil*
granulated sugar or cocoa, for coating finished truffles

In a microwave safe bowl, melt chocolate at 50% power, stirring occasionally, until smooth. Whisk in heavy cream and continue whisking until the mixture is shiny and smooth. Stir in orange extract or essential oil. (Taste and adjust orange flavor as desired.)

Refrigerate until firm, but pliable. Shape into balls and roll in sugar or cocoa. Store in airtight container at room temperature.

*other flavorings could be used by choosing a different extract - raspberry, cinnamon, coconut, peppermint, etc.

Recipe and image from letsdishrecipes.com

12.24.2021

Easy Microwave Caramels

1/2 cup butter
1/2 cup light corn syrup
1/2 cup sugar
1/2 cup brown sugar
1/2 cup sweetened condensed milk
pinch salt
1 tsp vanilla
flaky salt (optional)

Butter an 8x8 baking dish. Melt the *butter in a microwave safe bowl (I prefer one with a handle). Add the corn syrup, sugars, sweetened condensed milk, and salt. Whisk thoroughly.

Microwave on high for **6-7 minutes. (In my microwave, 6 min 20 sec is just right.)

Use hot pads to remove from the microwave. Stir in the vanilla. Pour into prepared pan and sprinkle with flaky salt, if desired.

Refrigerate until set, about 30 min. Then cut and wrap in wax paper squares. (I prefer to buy 4-5" pre-cut candy wrapper squares!) Caramels can be cut long and thin or into squares.

*Tip for melting butter without splatter: I set the microwave to power 7, and heat for 30 seconds at a time, stirring in-between. Melt butter until it's almost, but not quite, completely melted. Then stir until it finishes melting.

**The first time making caramels in your microwave, test the temp of the mixture after microwaving for 6 min. It should be 238-242 degrees on a candy thermometer.

Recipe and photo from cookingclassy.com

11.04.2021

Beef Empanadas

1 lb. ground beef
1/2 large onion
1 4oz can diced green chiles
1 tsp. salt
1/2 tsp. garlic powder
1 tsp. cumin
1 tsp. chili powder
1/4 tsp pepper
shredded cheese
1 egg
pie crust dough (2 pkgs pre-made or homemade)

In a large skillet, cook ground beef and onion until cooked through. Drain fat. Add green chiles, salt, garlic powder, cumin, chili powder, and pepper. Cook for 2 more minutes. Set aside.

Preheat oven to 400*. Prepare a baking sheet with cooking spray or a silicone mat. Roll out pie crust dough. Cut 8 circles with a 6" circle cutter/dough press. Set dough circle on press. Fill each circle with about 1/4 cup filling, then sprinkle with cheese. Press edges with dough press. (Alternatively, seal edges with a fork.) Beat egg and brush on top of each empanada. Set on baking sheet.

Bake 10-15 min, until golden brown. Makes 8 - 6" empanadas.

Recipe and photo adapted from lecremedelacrumb.com

4.05.2021

Romaine Salad with Poppy Seed Viniagrette

 VINAIGRETTE:
 1/4 cup granulated sugar
 1/3 cup white vinegar (see note)
 1/3 cup avocado oil, olive oil or vegetable oil
 2 tablespoons yellow mustard
 3/4 teaspoon salt
 3/4 teaspoon poppy seeds

CANDIED NUTS:
 1 cup chopped nuts (walnuts or pecans are my favorites)
 1/4 cup granulated sugar
 1 tablespoon butter
 Small pinch of salt and cayenne pepper

SALAD:
 2 heads of romaine lettuce, chopped
 1/2 cup feta, bleu or Parmesan cheese
 6-8 strips bacon, cooked and chopped or crumbled
 1/2 - 1 cup dried cranberries or cherries

INSTRUCTIONS
For the dressing, combine all the ingredients except the poppy seeds in a blender and process until combined. Add the poppy seeds and give it another whirl to combine. Pour in a jar and keep in the refrigerator until ready to serve.

For the nuts, in a 10-inch skillet, combine the nuts, sugar, butter, salt and cayenne. Heat over medium, stirring constantly with a silicone spatula or wooden spoon until the sugar and butter melts and coats the nuts, 3-5 minutes. Immediately scrape the nuts onto a sheet of parchment and separate carefully into pieces to cool.


In a large bowl, toss the lettuce, cheese, bacon, dried fruit, and cooled nuts (break them into smaller pieces with a mallet, if needed). Pour a bit of the dressing over the top and toss to combine. Add more dressing, if needed (you may not use it all). Serve immediately.

Photo & Recipe From Mel's Kitchen Cafe

12.31.2020

Creamy Chicken Soup with Turmeric

SOUP:
1-2 teaspoons olive oil
1 1/2 cups peeled, diced carrots (about 3-4 medium carrots)
3/4 cup diced celery (about 3 stalks)
1/2 cup diced onion, (1 small onion)
3-4 potatoes, diced (optional)
4 cups chicken broth (I use low sodium)
2 cubes chicken bouillon paste or granules (optional - see note)
3 bay leaves
1 tablespoon dried parsley
1 1/2 teaspoons herbs de provence (see note)
1 teaspoon turmeric
1/2 teaspoon garlic powder or 2-3 cloves garlic, finely minced
1/2 teaspoon coarsely ground black pepper
3 1/2 cups milk or half-and-half (or a combo - see note)
3-4 cups cooked, chopped chicken
1 lb. mini gnocchi (optional)
Shredded parmesan, asiago or gruyere cheese, for topping (optional)
Salt and pepper to taste
ROUX:
6 tablespoons all-purpose flour
3 tablespoons olive oil
3 tablespoons butter

INSTRUCTIONS

For the soup, in a 4-quart or larger saucepan, heat the olive oil over medium heat. Add the carrots, celery and onion (and potatoes, if desired). Pour in the broth and add the chicken bouillon, bay leaves, parsley, herbs de provence, turmeric, garlic powder, and pepper. (Add a little salt if broth and bouillon are low-sodium) Stir to combine. Bring the mixture to a simmer and cook, uncovered or partially covered, for 12-15 minutes until the vegetables are tender.

For the roux, while the soup simmers, in a small saucepan, add the olive oil and butter and cook on medium heat until the butter is melted. Add the flour and whisk to combine until a smooth paste forms. Remove from the heat.

Add the milk (and/or half-and-half) to the soup and heat through. Add the roux to the soup and cook, stirring or whisking constantly, over medium heat until the soup thickens and gently simmers, 5-7 minutes.

Stir in the chicken (and mini gnocchi, if desired), season to taste with salt and pepper (this is important for flavor!) and heat through. Remove the bay leaves and serve with a sprinkle of Parmesan, asiago or gruyere on top.

NOTES

Half-and-half: the more half-and-half you use, the creamier this soup will be but milk works great, too. I suggest using at least 1% or 2% (not skim).

Herbs de Provence: if you don't have herbs de , you can try adding a few substitute pantry spices although the flavor will be slightly different. Try a pinch of basil, oregano, thyme, sage, and rosemary.

Bouillon: the chicken bouillon (cube, paste or granules) intensifies the overall flavor of the soup. If you leave it out, season well to taste (with salt and pepper).

Potatoes: potatoes make a great addition to this soup. I add peeled, diced potatoes (usually Yukon gold, but any variety would work) with the broth.

Gnocchi or egg noodles would make a great, kid-friendly addition to this soup!

Recipe and photo from Mel's Kitchen Cafe, with a few adaptations

Fluffy Blender Rolls

 
2 1/2 cups hot water (not boiling; just hottest water from tap)
1/2 cup (1 stick, 4 ounces) butter (I use salted)
1/3 cup granulated sugar
2 teaspoons salt
2 large eggs
7 cups (35 ounces) all-purpose flour (see note)
1 1/2 tablespoons instant yeast (see note for active dry yeast)
6 tablespoons butter, melted

To a blender, add the hot water, butter (I just throw the whole stick in there), sugar, and salt. Blend for 10-15 seconds until well-combined. Add the eggs and blend until smooth.

In a large bowl, whisk together the flour and yeast.

Pour the wet ingredients over the flour and stir with a spoon (or use your hands) until well-combined and no dry streaks remain. The dough will be sticky and bumpy.

Cover and let rise until noticeably puffy and doubled, about 1 1/2 to 2 hours.

Divide the dough in half.

For folded square rolls, on a lightly floured counter, roll half of the dough into a thick rectangle, about 9X14-inches. Cut in half lengthwise and then cut each half into six rectangle pieces. Dip the bottom of each piece in butter and swipe the buttered end back and forth on a half sheet pan and then fold in half (see pictures in post for a visual). Repeat with remaining dough, spacing the rolls about 1/4-inch apart.

For crescent rolls, on a lightly floured counter, roll half of the dough into a thick circle, about 14-inches in diameter. Brush with melted butter. With a pizza cutter, cut into 12 equal pieces. Roll each piece up starting with the wide end and place on a parchment-lined half sheet pan. Repeat with remaining dough.

Cover the rolls and let rise until puffy, about 1 1/2 hours.

Preheat the oven to 375 degrees F. Bake for 15-18 minutes until golden. If desired, brush tops with melted butter while still warm.

NOTES

Yeast: I've only ever made this recipe with instant yeast (which doesn't need to be dissolved and proofed in liquid before using). If you want to use active dry yeast, use the same amount, but add it to the blender at the very end after adding the eggs and blend for just a second or two.

Flour: I use unbleached all-purpose flour; to measure the flour, fluff the flour very well, scoop in the cup and then level off with a knife. Don't pack the flour into the measuring cup or these rolls will be overfloured and dry. I haven't tried these rolls with 100% whole wheat flour, but I have subbed in two cups of whole wheat flour for two cups of white flour and it works great. I recommend using white whole wheat flour for a lighter, less dense roll.

Freezing: I haven't frozen the dough or the shaped rolls, but I have frozen the baked and cooled rolls, and they freeze great. Thaw at room temperature. They tend to dry out if warmed up too much, but they can be lightly warmed in a 200 degree oven for 10-15 minutes.

Doubling: this recipe doubles well. I use 2 1/2 tablespoons yeast for a double batch; everything else I double straight across.

Recipe and Photo from Mel's Kitchen Cafe

12.30.2020

Pumpkin Pie

CRUST:
 1 single crust pie shell for a 9-inch pie plate
FILLING:
 15-ounce can pumpkin puree
 1/2 cup granulated sugar
 1/2 cup lightly packed brown sugar
 1/2 teaspoon salt
 1 1/2 teaspoons ground cinnamon
 1/4 teaspoon ground nutmeg
 1 teaspoon ground ginger
 Pinch of cloves
 1 teaspoon vanilla extract
 2 large eggs
 2 large egg yolks
 2/3 cup heavy cream
 1/2 cup milk or half-and-half

INSTRUCTIONS

Roll out the pie crust (see this post for a step-by-step) and gently place it into a 9-inch pie plate, trimming and fluting the edges. Cover and refrigerate for at least an hour (or up to a day or so).

Preheat the oven to 425 degrees F. Line the crust with foil and pour in dried beans or pie weights (I've even used wheat berries) until completely full. Bake the pie crust for 15 minutes. Gently remove the foil and weights (or beans) and bake another 10 minutes until the dough no longer looks raw on the bottom. Remove from the oven while preparing the filling.

In a large bowl, whisk together the pumpkin, sugars, salt, cinnamon, nutmeg, ginger, cloves and vanilla until well-combined. Add the eggs, cream and milk and whisk until smooth (don't overmix or the pie will have a tendency to crack).

Place the pie shell on a baking sheet and pour the filling into the warm pie shell.

Bake for 10 minutes, without removing the pie, reduce the temperature to 350 degrees F and bake for 45-55 minutes longer until the pie is set and golden on top. If the crust starts to overbrown, cover it with foil strips or a pie shield partway through baking.

Serve with a dollop of sweetened whipped cream, if desired.

NOTES

Pie Crust: Mel likes to prebake the pie crust; it helps eliminate some of the gummy bottom crust common in pumpkin pie but if that doesn't bother you, you can forego that step and pour the filling into the unbaked pie shell. If you do that, still refrigerate the pie crust for an hour or so after placing it in the pan so it doesn't shrink while baking.

Recipe and Photo from Mel's Kitchen Cafe

Instant Pot Mashed Potatoes

4 pounds potatoes, peeled and cut into 1-inch cubes (see note about type of potatoes) 
2 teaspoons coarse, kosher salt
1 cup milk, preferably not skim
4 tablespoons butter, cut into tablespoon-size pieces
1/2 teaspoon garlic powder
1/2 cup sour cream OR 4 oz. cream cheese, softened

Add the potatoes and salt to the Instant Pot insert (6-quart). Add at least 1 1/2 cups water or enough to cover the potatoes (either way is fine). Don't exceed the max fill line.

Secure the lid on the Instant Pot, making sure the valve is set to "seal" and not "vent." Select Manual and then dial up or down to 8 minutes. The IP will start on its own.

While the potatoes cook, warm the milk, butter and garlic powder in a saucepan or microwave-safe container until the butter is melted and the mixture is warm.

When the potatoes are done cooking, quick release the pressure. If liquid bubbles and spurts from the valve, cover loosely with a damp dishcloth while the pressure releases. Drain the potatoes in a colander over the sink, discarding the cooking liquid. Return the potatoes to the insert of the Instant Pot and coarsely mash.

Add the 2/3 of the butter/milk mixture along with the sour cream, and mash until the potatoes are the desired texture, as smooth or as chunky as you like, adding more of the remaining milk/butter mixture if you want creamier, less stiff mashed potatoes (I usually add it all). Add salt and pepper to taste.

Serve immediately OR return the insert to the Instant Pot, secure the lid, and select Keep Warm. The potatoes can stay on this setting for up to three hours. When ready to serve, give the potatoes a good stir and a drizzle of warm milk, if needed.

NOTES

Potatoes: Mel's favorite type(s) of potatoes to use for mashing are a combination of red potatoes and Yukon gold potatoes. But you can definitely vary the type of potato used in this recipe without altering cooking time. 

Instant Pot: 4 or 5 lbs of potatoes will fit in a 6 qt. I.P. 8 lbs. will fit in an 8 quart I.P.

Recipe and Photo from Mel's Kitchen Cafe

Instant Pot BBQ Spare Ribs

https://damndelicious.net/2018/07/22/easy-instant-pot-bbq-ribs/
1 tablespoon brown sugar
2 teaspoons kosher salt
2 teaspoons onion powder
2 teaspoons chili powder
2 teaspoons ground mustard
1 1/2 teaspoons smoked paprika
1 teaspoon dried thyme
1 teaspoon dried oregano
1 teaspoon garlic powder
1 teaspoon freshly ground black pepper
3/4 teaspoon ground cumin
1/2 teaspoon cayenne pepper
2-3 lbs pork spare ribs (boneless or bone-in)
2 cups chicken stock
1/2 cup apple cider vinegar
2 cups good barbecue sauce

In a small bowl, combine brown sugar, salt, onion powder, chili powder, mustard, paprika, thyme, oregano, garlic powder, black pepper, cumin and cayenne pepper. Season spare ribs with brown sugar mixture, rubbing in thoroughly.

Add chicken stock and apple cider vinegar to a 6-qt Instant Pot. Layer spare ribs into the pot. Select manual setting; adjust pressure to high, and set time for 20-25 minutes. When finished cooking, quick-release pressure according to manufacturer’s directions.

Preheat oven to broil. Line a baking sheet with foil or silicone liner. Place meat, in a single layer onto the prepared baking sheet; brush with barbecue sauce. Place into oven and broil until barbecue sauce is caramelized and browned, about 4-6 minutes. Serve immediately with remaining barbecue sauce.

Recipe and photo: damndelicious.net

9.03.2020

Easy Fruit Ice Cream

image via alattefood.com
16 ounces frozen fruit*
1 cup heavy cream
1 cup milk
1/3 cup sugar
1/8 teaspoon fine sea salt
1 teaspoon vanilla extract

Combine all ingredients in the blender. Puree until completely smooth. Serve immediately for soft serve ice cream or pour into an ice cream maker and freeze according to the manufacturer's instructions. Transfer to an airtight container and freeze until ready to serve.

*If desired, reserve half the fruit and chop into small pieces. Stir into ice cream mixture after blending.

Easy Vanilla Ice Cream

1¾ cups heavy cream
1¼ cup whole milk
¾ cup sugar
1/8 teaspoon fine sea salt
1 tablespoon vanilla 
Optional: 2 cups of add-ins - oreos are a favorite!

Combine all ingredients, except add-in's. Stir to combine and chill in the refrigerator.

When ready to churn whisk mixture again and pour into ice cream maker. Churn according to the manufacturer's instructions. Oreos etc. should be added when the ice cream has started to noticeably thicken. Enjoy as soft-serve, or transfer the finished ice cream to an airtight container and place in the freezer until ready to serve. Enjoy!

Adapted From Barefeet in the Kitchen

Perfect Corn on the Cob

 7-8 ears of corn, husked and silky threads removed 4-6 quarts water
 2 tablespoons sugar
 2 tablespoons white vinegar

 Bring the water, sugar and vinegar to a boil in a large pot. Gently add the husked corn, submerging all the ears in the water the best that you can. Bring the water to a full boil again. This is important! It may take a few minutes for the water to come back to boiling temperature; have patience and persevere.

Once the water is at a full boil, cover the pot, remove from the heat and let the corn sit in the hot, steaming water for 10 minutes. (The corn can stay in the water for up to an hour before serving.)

Caramel Popcorn

image via Mel's Kitchen Cafe

10-12 cups plain popcorn, about 1/3 cup kernels, popped
1 cup packed brown sugar
1/2 cup (4 ounces, 8 tablespoons) butter
1/4 cup corn syrup
Pinch of salt 
1/2 teaspoon baking soda
1 teaspoon vanilla extract

Place the popcorn in a large bowl (you'll want extra room in the bowl for tossing the popcorn with the caramel).

In a medium saucepan, add the brown sugar, butter, corn syrup and salt. Heat the ingredients over medium-low until the butter is melted and the ingredients are combined. Increase the heat to medium and bring the mixture to a simmer, stirring often.

Cook for 3-4 minutes, stirring often.

Off the heat quickly whisk in the baking soda and vanilla (the mixture will foam and bubble). See note below about adding marshmallows.

Immediately pour the caramel over the popcorn in a slow steady drizzle, tossing the popcorn to evenly coat in the caramel mixture. The caramel will set up and harden a bit as it cools so mix as quickly as you can (an extra set of hands can help during this step).

Serve immediately or within a couple hours.

*Notes: For softer, gooier popcorn, use less popcorn. Also, if you want to amp up the gooey factor (for a marshmallow vibe), stir in 8-10 large marshmallows after the caramel mixture has simmered. 

From Mel's Kitchen Cafe

6.24.2020

Giant Chocolate Chip Cookie

1/2 cup sugar
1/2 cup brown sugar
1/2 teaspoon baking soda
1/4 teaspoon salt
1/2 cup butter, melted and cooled slightly
1 large egg
1/2 teaspoon vanilla extract
1 1/2 cups flour (add an extra 1/4 cup for a thicker cookie)
1/2 cup chocolate chips or m&ms, plus more to sprinkle on top, if desired

Preheat oven to 350 degrees F. Line a large, rimmed baking sheet (12-inches by 17-inches or so) with parchment paper or foil and lightly grease with cooking spray (can also use a silicone baking liner; no need to grease).
In a medium bowl, stir together the granulated sugar, brown sugar, baking soda and salt. Add the butter, egg and vanilla and mix until thick and well-combined. Add the flour and chocolate chips and mix until no dry streaks remain.
Press the cookie dough onto the center of the prepared pan into an evenly thick 9-inch circle. When it bakes, it spreads to about 11-12 inches (the cookie will fit perfectly onto a 12-inch round cardboard circle you can find at most craft stores).
If desired, top the cookie with additional chocolate chips or M&Ms. Bake for 13-16 minutes until the cookie is set around the edges and slightly crackly on top. Let the cookie cool completely on the baking pan – this helps the cookie set up so it can be easily lifted off the pan. Once cool, gently use the foil or parchment to lift the cookie off the pan; slide a thin spatula underneath to transfer. Cut into slices and serve!

from Mel's Kitchen Cafe

6.08.2020

Mom's Sheet Pan Brownies

Ever practical, my mom's sheet pan brownies are so easy, and perfect for large functions. They are more cake-like, and therefore easier to cut and serve.

2 pouches brownie mix*
1/3 cup flour
1/2 cup water
1 1/3 cup oil
6 eggs

*Mom uses specifically Betty Crocker fudge brownie mix, but I think other brands would work. This is basically following the directions on the box for cake-like brownies.

Combine ingredients and pour into a greased cookie sheet. Bake at 350 for 25-30 minutes.


For BYU Mint Brownies Frosting:

Icing Base
1 cup butter, room temperature
1/2 teaspoon salt
6 tablespoons milk
3 tablespoons light corn syrup
32 ounces powdered sugar
In stand mixer, mix ingredients together until smooth. Divide into two bowls then add one of the flavorings to each.

Mint Icing
Add 3/4 teaspoon mint extract and 2 to 3 drops green food coloring (or pink or red food coloring for Valentine’s Day) and stir until well blended. Spread mint icing over top of cooled brownies, then refrigerate for icing to get firm. Having pans with lids is very helpful when you make several pans full.

Chocolate Icing
Add 3 tablespoons hot water to 1/3 cup cocoa and whisk together. Spoon chocolate mixture into the other half of the icing, stirring until well mixed. Carefully spread chocolate icing over the mint icing layer after it has set. Cut into squares, then serve.

Favorite Potato Salad (Briana's)

8 cups cold water
5 teaspoons salt
2 tablespoons apple cider vinegar
5 pounds red or yukon potatoes, peeled and diced
10-20 eggs (depending on preference)

To an 8 qt. Instant Pot, add the water, salt, and vinegar. Then add the diced potatoes. Layer the eggs on top of the potatoes. Cook on LOW pressure for 0 minutes, then quick release. Place the hard boiled eggs in ice water to cool, then peel and chop. Drain the potatoes and cool for 30 min.

Dressing:
2 cups mayonnaise
2/3 cup buttermilk
1 1/2 teaspoons dried parsley
1 teaspoon salt
1 teaspoon onion powder
1 teaspoon garlic powder
1 teaspoon seasoned salt
1 teaspoon ground black pepper
2 tablespoons yellow mustard
1/2 to 1 cup chopped dill pickles

Combine all of the dressing ingredients. In a large bowl, add the potatoes and eggs, then the dressing. Stir gently to combine. Refrigerate for several hours, or even better, overnight.

This recipe serves a crowd. It is easily halved to make about 12 servings. 

recipe adapted from Mel's Kitchen Cafe and Amy + Jacky

6.02.2020

Freezer Breakfast Burritos

2 lb frozen southern style hash browns
seasoning salt
1 tablespoon oil
1/2 large onion, diced
1 small green pepper, diced
2 lb ground sausage
24 eggs
salt and pepper
shredded cheese
30 10-inch tortillas

Place hash browns on a baking sheet lined with a silicone mat. Sprinkle generously with seasoning salt. Stir to combine. Bake at 400* for 30 min, stirring every 10 min.

Meanwhile, in a large skillet, heat oil over medium heat. Add peppers and onion and cook until onion is soft and translucent. Remove from pan.

Brown sausage in pan. Drain grease. Remove sausage from pan.

Add eggs to the pan and scramble with salt and pepper.

In the skillet, combine hash browns, peppers, onion, sausage, and eggs. Place 3/4 cup of mixture in line down the center of a tortilla. Top generously with shredded cheese. Fold in sides of tortilla and roll up. Wrap in plastic wrap. Place burritos in a large ziploc and freeze. Makes about 30.

Freezer Beef and Bean Burritos

 1 1/2 pounds lean ground beef
 1 cup chopped onion
 1 teaspoon salt
 1/4 teaspoon black pepper
 3 cans (16 oz ea) refried beans OR 6 cups homemade refried beans*
 3 cans (4 ounces) green chiles (mild, medium or hot, depending on preference)
 1 1/2 cups (12 ounces) green taco sauce
 1 1/2 cups (12 ounces) red taco sauce
 1/2 cup (4 ounces) salsa, green or red
 1 teaspoon ground cumin
 1 teaspoon chili powder
 1/2 teaspoon garlic powder
 1/2 teaspoon onion powder
 6 to 7 cups shredded cheese (I prefer using a mix of cheddar and Monterey Jack)
 20 10-inch tortillas or 30 8-inch tortillas

In a large saucepan, brown the ground beef and onion with the salt and pepper until cooked through, breaking the meat into small pieces as it cooks. Drain excess grease.

Add the remaining ingredients (except for the cheese and tortillas) and mix to combine. Heat through, stirring often to prevent sticking. Add additional salt and pepper to taste.

Let the mixture cool slightly. Spread about 1/3 to 1/2 cup of the filling on each tortilla (depending on the size of the tortilla and how stuffed you want them). Sprinkle about 1/4 cup cheese (or so!) on the filling. Fold in the sides and then roll the burrito closed.

Wrap each one individually in plastic wrap and then put them in large ziploc bags and freeze. Makes about 30.

To reheat, unwrap burrito from plastic wrap and microwave for one minute. Poke holes in the semi-thawed burrito with a fork or cut the burrito in half and microwave for 1-minute intervals until heated through. They'll be piping hot! Eat carefully.

*For the homemade beans: I make them in the Instant Pot as directed, then I drain them really well before mashing them. They end up being very thick, which helps the burrito mixture to be less runny. After I take out the 6 cups that I need for this recipe, I add back in some of the beans' cooking liquid to get a better consistency for regular use.

Recipe from Mel's Kitchen Cafe 

Simple Rice Pilaf

1 cup long-grain white rice
2-4 tablespoons butter
1/2 medium onion, diced
1/4 cup orange or red pepper, minced
1/2 teaspoon salt
1 3/4 cups chicken broth (or 1 - 14.5 oz can)

Place the rice in a fine strainer and rinse until water runs clear. Set aside. In a medium saucepan, melt the butter over medium heat, then add the onion and peppers and cook until soft and translucent. Add the rice to the pan and toast it for a few minutes until fragrant. Add the broth and salt. Bring to a boil over med-high heat. As soon as the water comes to a boil, reduce heat to low and cover the pot. Cook without lifting the lid for 20 minutes. Remove the pan from the heat and let sit, covered, for another 5-10 minutes. Remove the lid and fluff the rice with a fork. Serve.

3.04.2020

Sheet Pan Lemon Garlic Shrimp & Asparagus

For Asparagus:
1 pound thin/medium asparagus, ends trimmed
1 tablespoon olive oil
1 garlic clove, minced
1/4 teaspoon salt
1/8 teaspoon pepper

For Shrimp:
1 pound medium or large uncooked shrimp (tail-off, peeled, and deveined), thawed if frozen
1 tablespoon olive oil
2-3 garlic cloves, minced
1/2 teaspoon salt
1/4 teaspoon paprika
1/8 teaspoon pepper
1/8-1/4 teaspoon red pepper flakes
1 tablespoon dried parsley
1 1/2 tablespoons lemon juice or more to taste
3 tablespoons butter, cubed

1/2 pound angel hair pasta (optional)

Preheat oven to 400 degrees. Cook pasta (if using) according to package directions while continuing with the recipe.

Line a baking sheet with foil. Add asparagus and drizzle with olive oil. Add garlic, salt, and pepper. Toss until evenly coated then arrange asparagus in a single layer. Roast for 4-6 minutes depending on thickness.

Meanwhile, in a large bowl, combine shrimp, olive oil, garlic, salt, paprika, pepper, red pepper flakes, parsley, and lemon juice. Remove pan from the oven and move the asparagus to one side. Arrange the shrimp evenly on the other side of the pan. Dot asparagus and shrimp with the cubed butter.

Bake for 6 minutes or just until shrimp is opaque. Serve shrimp over pasta.

*We double the shrimp and pasta for our large family and bake on one extra-large baking sheet.

Adapted from carlsbadcravings.com

9.10.2019

Beef and Broccoli

Don't let the long recipe deter you, this Beef & Broccoli is restaurant quality yummy!

Beef Marinade
1 pound flank steak cut *ACROSS the grain into 1/8" thin slices, then cut into 2” length pieces
3 tablespoons reduced sodium soy sauce (I like La Choy brand)
1 tablespoon hoisin sauce (Lee Kum Kee brand is good)
1 teaspoon Sriracha/hot Asian chili sauce
2 teaspoons cornstarch
1/2 teaspoon garlic powder
1/2 teaspoon ginger powder

Sauce
1 tablespoon Japanese rice wine (I use white grape juice)
2 tablespoons low sodium chicken broth
5 tablespoons oyster sauce (Lee Kum Kee brand is good)
3 tablespoons brown sugar
1/2 teaspoon sesame oil
2 teaspoons cornstarch
1/2 teaspoon salt
1/2 teaspoon pepper

Extra
6 medium garlic cloves, minced or pressed
1 tablespoon minced ginger
peanut oil or vegetable oil
3 1/2 - 4 cups broccoli florets cut into bit size pieces
1/4 cup water
1-2 7oz. pkg's of refrigerated Yakisoba noodles (optional - I add the noodles because - kids!)
3 green onions, sliced (optional)

Instructions
1. Pour marinade ingredients directly into freezer bag and mix well. Add beef and massage in marinade. Marinate at room temperature for 30 minutes or refrigerate for 2-8 hours.

2. When ready to make Beef and Broccoli, whisk the sauce ingredients together in a small bowl.

3. In another small bowl, combine garlic, ginger, and 1 teaspoon peanut oil. Set aside.

4. If using Yakisoba noodles, remove from package, discard seasoning packet, and place in colander. Rinse with hot water to soften and loosen up the noddles. Set aside.

5. Drain excess marinade off of beef (if there is any).

6. *Work in 2 batches if your beef cannot fit in one layer.* Heat 1 1/2 teaspoons peanut oil/vegetable oil in a large nonstick skillet over high heat until very hot and sizzling. Add beef to the skillet and break up any clumps; cook without stirring for 1 minute, then stir and cook until beef is browned and almost cooked through, about 1-2 minutes (it will cook more in the sauce). Don’t overcook or it won’t be as tender! Transfer beef to a large plate and cover.

7. Add 1 tablespoon peanut oil/vegetable oil to the now-empty skillet; heat until very hot and sizzling. Add the broccoli and saute for 30 seconds. Add water, cover pan, and lower heat to medium. Steam broccoli until crisp-tender, about 2 minutes.

8. Push the broccoli to the sides of the skillet and add the garlic/ginger/oil to the center of the pan, mashing the mixture with a spoon, until fragrant, about 15 to 20 seconds, then stir the mixture into the broccoli.

9. Return the beef to the skillet and toss to combine. Whisk the sauce to recombine then add to the skillet. Cook, stirring constantly, until the sauce is thickened and beef is cooked through, about 1-2 minutes. Stir in optional Yakisoba noodles, if desired. Transfer to a serving platter, sprinkle with the green onions and serve. If not using noodles, serve over rice.

*Tip: to more easily thinly slice the meat, freeze for at least 30 minutes before cutting and use a very sharp knife. Cutting across the grain means to cut perpendicular to the muscle fibers or "grain" of the meat. This leads to more tender beef!

Slightly adapted from carlsbadcravings.com

8.14.2019

Instant Pot Shredded Chicken

1 cup chicken broth
4-5 chicken breasts, fresh or frozen*
salt and pepper to taste
additional seasonings if desired (seasoning salt, garlic powder, etc.)

Place broth in instant pot. Season chicken breasts as desired. Cut breasts in half or thirds to ensure even cooking. Arrange in instant pot. Close lid, set to seal. Cook on high pressure for 10 minutes. (*Cook for 12 minutes if using frozen chicken.) Allow pressure to release naturally for 10 more minutes, then manually release. Remove chicken to a plate and shred with 2 forks. Place back in pot to absorb a little of the liquid.

Ready to use or freeze as desired.

7.15.2019

Instant Pot All-In-One Alfredo

https://cookingwithkarli.com/dump-and-start-instant-pot-alfredo/
3 cups low-sodium chicken broth*
3 cups heavy cream*
2 tsp dry minced garlic
1 tsp salt
fresh ground pepper, to taste
1 lb. linguine pasta, broken in half
1 1/2 - 2 cups freshly shredded parmesan cheese

Add the broth, cream, garlic, salt, pepper and noodles to the instant pot in that order. Do not stir, but make sure all noodles are covered. If you need to move some noodles around, that's okay.

Set your Instant Pot to Manual for 6 minutes, and then let it naturally release its pressure for an additional 6 minutes, then quick release.

Remove lid. Let the noodles and sauce sit for a minute or so until it stops bubbling - this is very important! Your cheese will not melt into the sauce if it doesn't cool for a minute or two.
Gradually stir in the parmesan cheese.

This recipe can be easily halved. Leftovers are best when you add a splash of milk to reheat.

*For a lighter version, substitute 5 cups broth & 2 cups evaporated milk.

adapted from cookingwithkarli.com

7.12.2019

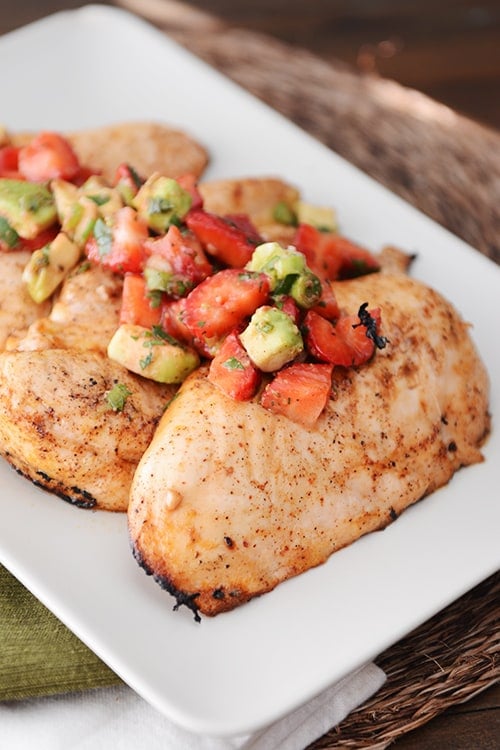
Grilled Chile Lime Chicken with Strawberry Avocado Salsa

CHILI-LIME MARINADE:
 2 tablespoons lime juice (from 1-2 limes)
 1 tablespoon olive oil
 1 tablespoon honey
 1 large garlic clove, minced
 1 teaspoon chili powder
 1/2 teaspoon salt
 4 boneless, skinless chicken breasts (see note)

STRAWBERRY AVOCADO SALSA:
 6-8 ounces strawberries, hulled and diced
 1/2 avocado, pitted, peeled and diced
 2 green onions, chopped
 1-2 tablespoons chopped fresh cilantro
 1 tablespoon lime juice (about 1 lime)
 1/4 teaspoon chili powder
 1/4 teaspoon ground cumin
 Salt and pepper, to taste

INSTRUCTIONS
For the marinade, whisk together the lime juice, olive oil, honey, garlic, chili powder and salt. Place the chicken in a gallon-size ziploc bag or shallow dish and pour in the marinade. Turn the chicken to coat in the mixture. Refrigerate for 4-8 hours, turning once or twice.
Preheat a grill to medium heat and cook the chicken 6-7 minutes per side, more or less depending on the thickness of the chicken (until an instant-read thermometer registers 165 degrees F at the thickest part of the chicken). Remove the chicken from the grill and tent with foil for 5 minutes or so while whipping up the salsa.
For the salsa, toss all the ingredients together in a bowl; don't forget the salt and pepper. Serve with the warm grilled chicken.

NOTES
Chicken: many times, if the boneless, skinless chicken breasts I have on hand are really thick, I cut them in half (like a hamburger bun) to create two thinner chicken cutlets. This helps the chicken get more punch from the marinade as well help stretch your budget/chicken. For this recipe, I've used four average-sized boneless skinless chicken breasts without cutting them and I've also used two large chicken breasts, cut them in half like I described above, for four chicken pieces. Make sense?

Marinade: this recipe doesn't make a ton of marinade but it's enough to get a light coating over the chicken (turning it once or twice during marinading time helps). Definitely double the marinade ingredients if using more chicken.

Salsa: the salsa does best made right before serving.

Recipe from Mel's Kitchen Cafe

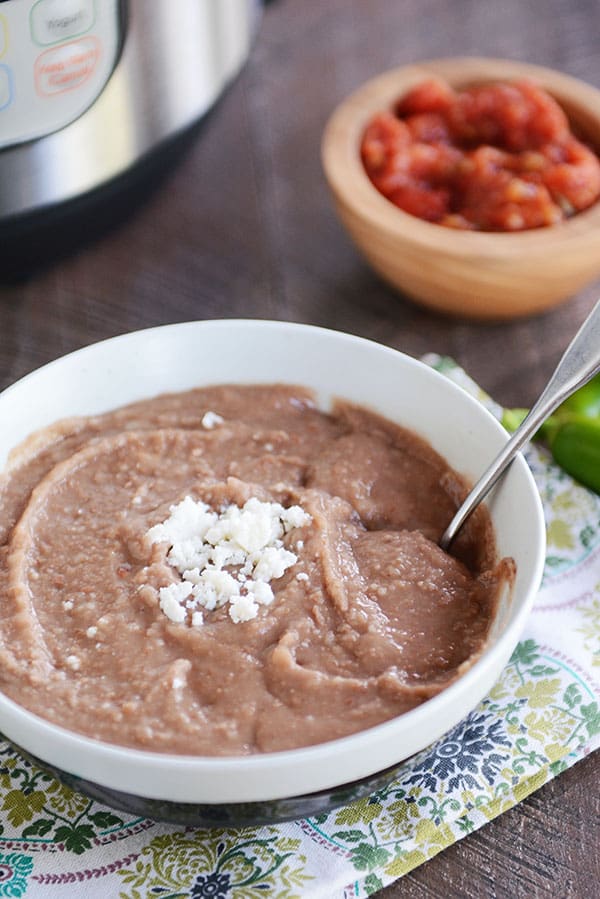
Instant Pot Refried Beans

1 tablespoon olive oil
1 jalapeño, cored, seeded and finely chopped
1 small onion, chopped (about 1/2 cup)
3-4 cloves garlic, finely minced
1 1/2 pounds dry pinto beans, rinsed
8 cups water
4 cups low-sodium chicken or vegetable broth
2 teaspoons salt
2 tablespoons white vinegar

INSTRUCTIONS
In the insert of an electric pressure cooker (or in a stovetop pressure cooker), heat the oil (using the Sauté function on the InstantPot) and add the jalapeño, onion, and garlic, and sauté for 1-2 minutes, stirring often.

Add the rinsed and drained beans, water, broth, salt and vinegar.
Secure the lid on the instant pot and cook on high pressure for 35 minutes.
Let the pressure naturally release. Reserve two cups of the liquid in a separate bowl.
Drain the rest of the liquid off the beans. Using an immersion blender, potato masher (or spooning the beans into a blender), process/mash to the desired consistency, adding reserved cooking water, if needed for a smoother/softer consistency. Refrigerate for up to a week or freeze for several months.

Angie's Notes:
I can fit 2 lbs of dry pinto beans in my 6 quart instant pot - the beans are a bit older. Start with 1 1/2 lbs, but if the beans don't come close to the max line on the IP when cooked, you can probably increase the amount next time. In an 8 quart IP you can cook 2 1/2 to 3 lbs of beans.

Recipe and photo from Mel's Kitchen Cafe

7.11.2019

Heather's S'mores Bars

1/2 cup butter, softened
3/4 cup sugar
1 egg
1 teaspoon vanilla
1 1/3 cup flour
3/4 cup graham cracker crumbs
1 teaspoon baking powder
1/4 teaspoon salt
chocolate chips
mini marshmallows

Cream butter and sugar. Add egg, vanilla, flour, cracker crumbs, baking powder, and salt. Press half of the dough into a greased 8" pan. Sprinkle with chocolate chips and mini marshmallows. Crumble the rest of the dough on top and press it down lightly. Bake at 350 for 30-35 minutes.

image from averiecooks.com

Sally's Frito Salad

2 tablespoons ranch dressing
1/2 cup mayonnaise
1/4 cup red onion, diced
1/2 cup red pepper, diced
1/2 cup orange or yellow pepper, diced
1/2 cup sharp cheddar cheese, shredded
1/2-3/4 of 9oz. bag Chili Cheese Fritos corn chips

In a large bowl, mix together ranch, mayo, onion, and peppers. Refrigerate. When ready to serve add cheese, and chips to taste.

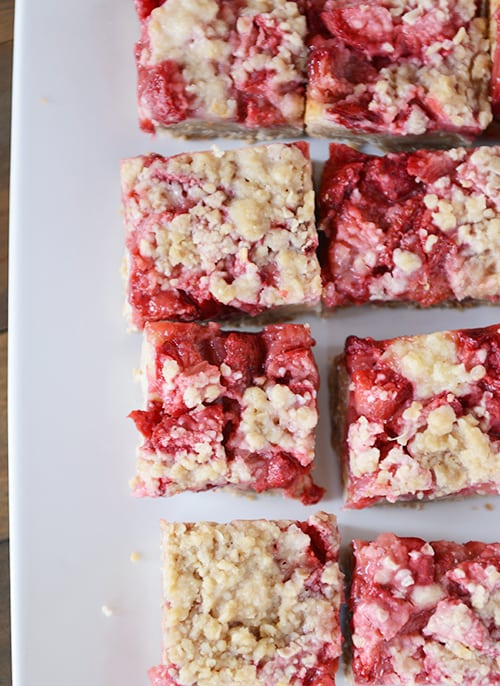
Mel's Strawberry Shortcake Bars

CRUST:
 1 1/4 (6.25 ounces) cups all-purpose flour
 1 cup (4 ounces) quick oatmeal (see note)
 1/2 cup (3.5 ounces) lightly packed brown sugar
 1/4 teaspoon salt
 1/4 teaspoon ground nutmeg
 14 tablespoons (7 ounces) cold butter, cut into cubes
FILLING:
 1 1/2 cups (7.5 ounces) all-purpose flour
 1 teaspoon baking powder
 1/2 teaspoon salt
 3/4 cup granulated sugar
 8 tablespoons (4 ounces) butter, melted
 1 large egg
STRAWBERRY TOPPING:
 2 pounds diced fresh strawberries
 1/2 cup (3.5 ounces) granulated sugar
 1 tablespoon cornstarch
 1/4 teaspoon ground nutmeg
 1/2 teaspoon vanilla extract

INSTRUCTIONS
Preheat the oven to 350 degrees F. Line a 9X13-inch pan with foil and lightly grease (the foil makes for easier cleanup but you can leave it out and just grease the pan).
For the crust, in a large bowl combine the flour, oatmeal, brown sugar, salt and nutmeg. Toss in the cubed butter and cut it into the dry mixture using a pastry blender or two knives or just your fingers until the mixture resembles coarse crumbs. Measure out 1 cup of the mixture and set it aside for later. Press the rest of the crust into the bottom of the prepared pan and bake for 8 minutes.

While the crust bakes, make the filling by whisking together the flour, baking powder, salt and sugar (you can use the same bowl as the crust without washing it out if you want to save a dish). Make a well in the center and pour in the butter and egg. Stir with a rubber spatula until smooth and combined - it will be pretty thick. Crumble this mixture over the warm crust and pat into a relatively even layer (doesn't have to be perfect).

In a medium bowl, toss the strawberries with the sugar, cornstarch, nutmeg and vanilla. Spread evenly over the filling and sprinkle the reserved streusel/crust mixture over the top.
Bake the bars for 40-45 minutes until they are just lightly golden around the edges and the center is no longer soft/jiggly.

Cool completely in the pan. Cut into bars and serve. Store the bars in the refrigerator if not serving within an hour or two (I like to let them sit at room temperature out of the fridge for 20-30 minutes to take the chill off).

NOTES
Oats: you could substitute old-fashioned rolled oats for the quick oats but I'd suggest giving them a quick whirl in the blender/food processor to refine the texture just a bit.

Recipe and photo from Mel's Kitchen Cafe

Mel's Beef Stroganoff - Instant Pot (or Beef over Rice or Mashed Potatoes)

2-3 pounds stew meat (or a 3-pound beef roast, cubed)
 1 teaspoon salt
 1/4 teaspoon black pepper
 1 medium yellow onion, diced (see note)
 1/4 teaspoon garlic powder or 1-2 cloves garlic, finely minced
 1 tablespoon Worcestershire sauce
 1 1/2 cups beef broth or stock (I use low-sodium)
 1 tablespoon ketchup
 1/3 cup flour
 1/2 cup beef broth, water or apple juice
 4 to 8 ounces sliced mushrooms (optional)
 1/2 cup light or regular sour cream

INSTRUCTIONS
Place the stew meat, salt, pepper and onion in the insert of the Instant Pot. Stir to distribute the seasonings and onion. In a small bowl, combine the garlic powder (or fresh garlic), Worcestershire sauce, beef broth and ketchup. Pour over the meat.

Secure the lid and valve and cook on high pressure for 35 minutes (press "pressure cook" or "manual" and dial up or down to 35 minutes; the pressure cooker will start on its own). Let the pressure naturally release for 10 minutes and then quick release the remaining pressure. Stir the meat mixture with a wooden spoon to break up any large clumps of meat.
Combine the flour and broth/water/apple juice in a small bowl, whisking vigorously to combine well (a blender works great as well). The roux should be thick but still pourable. Add additional broth or water, if needed.

Select the saute function on the Instant Pot. Pour the roux mixture into the Instant Pot, whisking quickly to avoid lumps, and continue mixing until evenly and well combined. Add the mushrooms, if using, and stir to combine. Continue cooking on the saute setting, stirring often to prevent sticking, until the stroganoff is thickened. Set the Instant Pot to warm and stir in the sour cream. Serve over pasta, rice or baked potatoes.

My Note: This is excellent served as beef and gravy over rice or mashed potatoes. In which case I prefer to omit the sour cream.

Recipe and photo from Mel's Kitchen Cafe

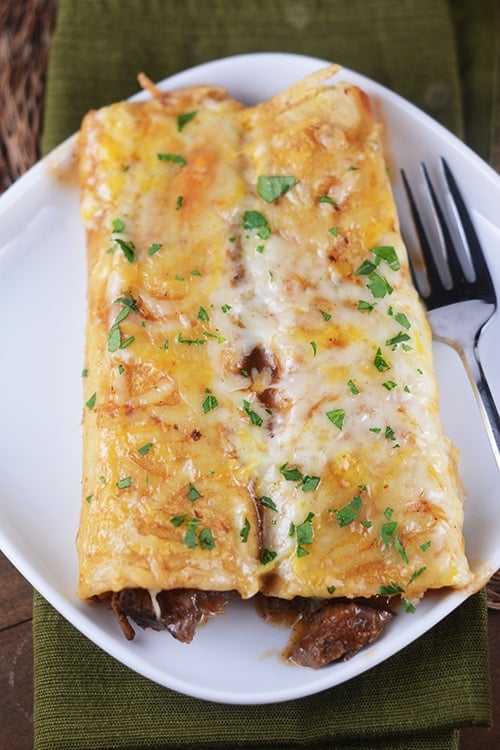
Mel's Beef Enchiladas

1 (2-3 pound) chuck or sirloin beef roast
2 cups low-sodium beef broth
2 tablespoons apple cider vinegar
1 cup (8 ounces) salsa
1 teaspoon ground cumin
1 teaspoon chili powder
1 teaspoon onion powder
1 teaspoon garlic powder
1 teaspoon salt
1/2 teaspoon pepper
1/4 cup cornstarch
10 6- or 7-inch flour or corn tortillas
2 cups shredded cheddar jack cheese
Fresh cilantro (optional)

Cut the beef roast into thirds and add to an instant pot. Whisk together the broth, vinegar, salsa, cumin, chili powder, onion powder, garlic powder, salt and pepper. Pour over the roast. Cook on high pressure for 55 minutes. Natural release pressure for 10 min, then quick release.

Remove the roast and place in a large bowl or shallow pan (like a 9X13). Shred with 2 forks. Pour the mixture from the instant pot into a saucepan and bring to a simmer. (This can also be done in the instant pot on the saute setting.) In a small bowl, whisk together the cornstarch with about 2-3 tablespoons water. Whisk the slurry into the simmering liquid and cook, stirring constantly, until the mixture is thickened slightly, 4-5 minutes. Add additional salt and pepper to taste, if needed.

Pour about 1/2 cup sauce in with the beef and toss. Spread another 1/2 cup sauce on the bottom of a 9X13-inch pan. Fill each tortilla with some of the beef mixture and a sprinkle of cheese. Roll up and place in the pan. I usually try and fit ten enchiladas in a 9X13-inch pan (if the pan is lengthwise, two rows of five).

Pour the remaining sauce over the enchiladas (you may not need to use all the sauce if you feel like it will drown the enchiladas or you may need to reserve some for an additional pan if you made more enchiladas due to a larger roast, etc.). Top with more cheese and bake at 350 degrees for 20-30 minutes until bubbly and hot. Let the enchiladas rest for 5-10 minutes before serving. Sprinkle with fresh cilantro, if desired, and serve.

Recipe and photo from Mel's Kitchen Cafe 
(adapted slightly for instant pot - see original recipe for slow cooker directions)

6.22.2019

Kalua Pork

3-12 lbs. boneless pork shoulder/butt roast
1-2 tablespoons* coarse, pink sea salt (or Hawaiian sea salt)
1-2 tablespoons* liquid smoke
*amount of salt depends on size of roast. For 3-6 lbs use ~1 Tbs, for 6-12 lbs use ~2 or more Tbs.

Slow Cooker Directions:
Prick the roast all over with a fork. Pour liquid smoke over the roast generously and rub in. Sprinkle salt all over and rub in. Place in slow cooker and cook on low 8-12 hours, checking for doneness at hrs, then every hour until roast is tender and easily shreds.

Instant Pot Directions:
Cut roast up into 3-4" pieces. Sprinkle with liquid smoke and salt and combine thoroughly, rubbing salt into meat. Pour 1 cup cold water into Instant Pot. Place meat in Instant Pot. Set Instant Pot to manual, high pressure, for 45-55 minutes (45 for smaller roast, 55 for larger roast). Natural release for 15 minutes.


12.23.2018

Ribbon Layered Jello

My mom always shrugs off the accolades she receives for this jello by saying, "Yes, I can boil water!" It may be "just jello," but this is the holy grail of jello. If you can do this, you know you've made it! The directions are long and seem complex, and this will take you several hours to make, but be not afraid - once you get into a rhythm it's a cinch.

First: Choose your colors/opacity and the order they'll be in. Maybe write it down! (You can fit about 11 layers in a normal 9x13 glass pan.) You're going to work backwards (bottom to top). Spray a 9x13 clear glass pan with cooking spray. Also, prepare a shelf in your fridge for the jello - making sure it's level.

Layer Choices and Instructions:

Colored Clear Layer:
1 packet unflavored gelatin (like Knox)
1/4 c. cold water
1 c. boiling water
1 3oz. pkg. jello (color of your choice)

In a glass mixing bowl, sprinkle 1 packet gelatin over 1/4 c. cold water. Allow to sit for several minutes to activate. Then add 1 c. boiling water. Stir to dissolve gelatin. Then add 1 3oz. pkg. jello. Stir gently to avoid bubbles.

Colored Opaque Layer:
1 packet unflavored gelatin
1/4 c. cold water
1/2 c. boiling water
1 3oz. pkg. jello (color of your choice)
1/2 c. plain yogurt

In a glass mixing bowl, sprinkle 1 packet gelatin over 1/4 c. cold water. Allow to sit for several minutes to activate. Then add 1/2 c. boiling water. Stir to dissolve gelatin. Then add 1 3oz. pkg. jello. Stir until dissolved, then add 1/2 c. plain yogurt. Stir gently until smooth. (A whisk may work best for stirring in the yogurt.)

White Layer: *this makes enough for several layers
2 packets unflavored gelatin
1/2 c. cold water
1 c. boiling water
2 Tbs. sugar
1 c. plain yogurt

In a glass mixing bowl, sprinkle 2 packets gelatin over 1/2 c. cold water. Allow to sit for several minutes to activate. Then add 1 c. boiling water and 2 Tbs sugar. Stir to dissolve. Then add 1 c. plain yogurt. Stir gently (with a whisk if desired) until smooth. *Use only 1 cup of this mixture per layer. The rest can sit on the counter at room temp.

ASSEMBLY:
Prepare your first 1-2 layers. Pour first layer of jello mixture into prepared 9x13 pan. Pop any bubbles. Refrigerate for 15-20 min. Meanwhile make the next layer. After 15 min, check your first layer. If set, add the next layer by pouring it gently over the first. Repeat until finished!

Tips:
*Make sure each layer has cooled to room temperature before adding to jello.
*Staying about 2 layers ahead of yourself allows the jello to cool thoroughly.
*If jello cools too much in the bowl and starts to set, you can microwave it for 15 sec. at a time until it's just liquid again.
*Don't leave the jello refrigerating between layers for too long, or the next layer won't stick well.

12.29.2017

Stovetop Macaroni and Cheese

2 c. macaroni
1/4 c. butter
2 Tbs. flour
1 c. milk
1 c. shredded cheese
dash garlic powder
1/2 tsp. dry mustard powder
1/2 tsp. salt

Boil pasta until done, drain. In the microwave or on the stovetop, melt butter. Whisk in the flour. Slowly whisk in the milk. Heat and stir until thick, then add the cheese and seasonings. Add cooked macaroni. 


10.21.2017

Hawaiian Haystacks

2 boneless, skinless chicken breasts, cut into bite-size chunks (or leftover cooked chicken, cubed)
3 tablespoons butter
½ onion (about ½ cup), finely chopped
3 cloves garlic; finely minced
1 teaspoon salt
½ teaspoon pepper
¼ cup flour
2 cups chicken broth
1 cup milk

cooked rice
toppings

In a large skillet melt the butter over medium heat and add the onion and raw chicken (if using leftover cooked chicken, don’t add it to the skillet now, you’ll add it later). Saute the onion and chicken, if using, until the onions are soft and translucent and the chicken is cooked through, about 5 to 6 minutes. Add the garlic and cook for about one minute, stirring, until fragrant.

Sprinkle the flour over the onions and chicken and stir to combine. Cook over medium heat for one minute – this helps get rid of the starchy, flour taste. Slowly whisk in the milk and chicken broth. Cook, stirring constantly with a whisk, and bring the sauce to a simmer over medium to medium-high heat. Add the salt and pepper. If you are using leftover cooked chicken, add it now. Continue simmering, stirring the sauce frequently, until the sauce has thickened, about 5-8 minutes.

Serve the chicken sauce over rice with your toppings of choice, such as chow mein noodles, shredded cheese, pineapple tidbits, carrots, celery, green onions, coconut, tomatoes, etc.

from Mel's Kitchen Cafe

Sour Cream Muffins

1 3/4 cups (8.75 ounces) all-purpose flour
1 teaspoon baking soda
1/2 teaspoon salt
1/8 teaspoon ground nutmeg (it's very subtle)
1 cup (8 ounces) sour cream
1/2 cup (3.75 ounces) granulated sugar
1/2 cup coconut oil or butter, melted
1 teaspoon vanilla extract
2 large eggs

Preheat the oven to 350 degrees F. Lightly coat a 12-cup muffin tin with nonstick cooking spray or line with muffin liners.
In a medium bowl, whisk together the flour, baking soda, salt and nutmeg.
In a liquid measuring cup or in a separate bowl, whisk together the sour cream, granulated sugar, coconut oil, vanilla and eggs.
Pour the wet ingredients into the center of the dry and using a rubber spatula or large spoon, fold and mix until just incorporated (no overmixing unless you want dense, dry muffins!). The batter will be on the thick side of things.
Fill the muffin tins evenly, 1/2 to 2/3 full, and bake for 14-16 minutes until the top lightly springs back to the touch.

Recipe and photo from Mel's Kitchen Cafe

Sheet Pan Roasted Sausage and Veggies

This is a super quick, easy, and delicious dinner. It's very customizable!

chicken sausage, sliced (we like Aidell's chicken & apple/pineapple)
any vegetables, fresh or frozen: green beans, asparagus, onions, peppers, potatoes, squash, broccoli,     tomatoes, etc.
olive oil
salt
fresh ground pepper
other seasonings if desired: italian seasoning, rosemary, thyme, dill, parmesan, etc.

Preheat oven to 400*. Spread sausage and vegetables on sheet pan. Drizzle with olive oil. Sprinkle with salt, fresh ground pepper, and any additional seasonings. Toss to coat. Bake for 30 minutes or until vegetables are tender. Turn over mid-bake if you remember!

5.23.2017

Baked French Fries

6 Yukon Gold potatoes, cut into thick fries
1 tablespoon white sugar
1/4 cup extra-virgin olive oil
1 teaspoon garlic powder, or more to taste
1 teaspoon salt, or more to taste
1 teaspoon ground black pepper, or more to taste

Preheat oven to 425. Line a baking sheet with aluminum foil; spray with cooking spray.
Place sliced potatoes in a colander; sprinkle sugar over potatoes. Set aside until liquid is released from potatoes, 20 to 30 minutes. Drain liquid and dry potatoes well.
Mix potato slices, olive oil, garlic powder, salt, and black pepper in a resealable bag until evenly coated. Spread coated potato slices in a single layer, leaving space around each potato, on the prepared baking sheet.
Bake in the preheated oven for 20 minutes; flip fries and continue baking until crisp and browned, about 20 more minutes.